Microtiter plates, also known as microplates or 96-well plates, are commonly used tools in laboratories for conducting various types of experiments, especially those involving multiple samples simultaneously. They are versatile, easy to use, and essential in fields such as biology, chemistry, and pharmacology. This guide will take you through the basics of using a microtiter plate, from understanding its structure to performing a simple experiment.
What is a Microtiter Plate?
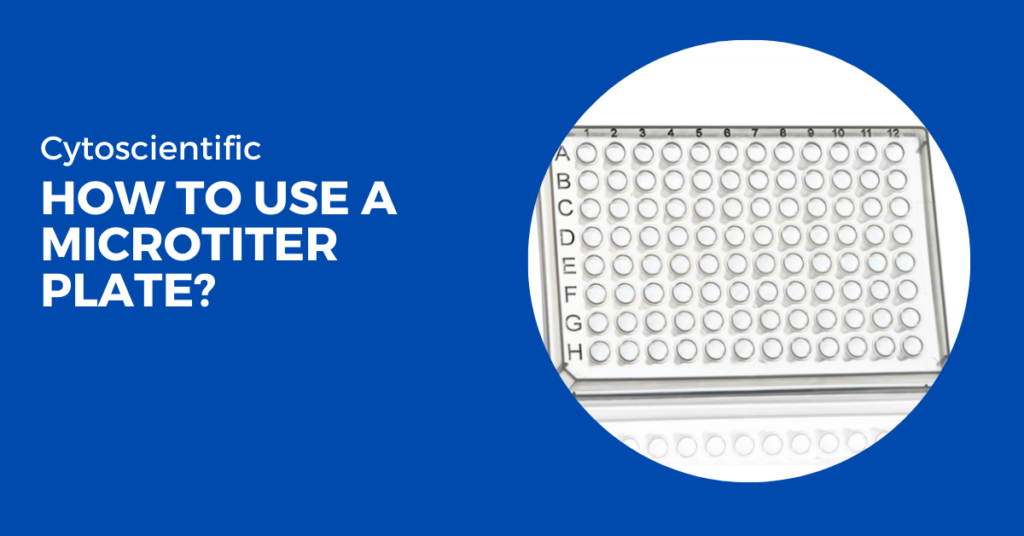
A microtiter plate is a flat plate with multiple wells (small cavities) arranged in a grid. The most common format is the 96-well plate, which has 8 rows and 12 columns, making a total of 96 wells. Each well can hold a small volume of liquid, and the plate is usually made of plastic. Other formats, such as 384-well or 24-well plates, are also available to accommodate different experimental needs.

Why Use a Microtiter Plate?
Getting Started with a Microtiter Plate
1. Understanding the Layout
Before using a microtiter plate, familiarize yourself with its layout. The plate arranges the wells in a grid, labeling the rows with letters (A-H) and the columns with numbers (1-12). This layout makes it easy to identify and keep track of each sample. For example, the well in the top left corner is labeled A1, while the bottom right corner is labeled H12.
2. Choosing the Right Plate
Microtiter plates are available in different materials such as polystyrene, polypropylene, or glass. The selection of material depends on the specific requirements of your experiment. For instance:
- Polystyrene plates are clear and typically used for optical measurements.
- Polypropylene plates are chemically resistant and suitable for sample storage.
- Glass plates are utilized for specialized applications such as crystallography.
3. Setting Up Your Experiment
Start by gathering all the materials you’ll need, such as reagents, samples, pipettes, and the microtiter plate. It’s important to work in a clean environment to avoid contamination.
4. Loading the Plate
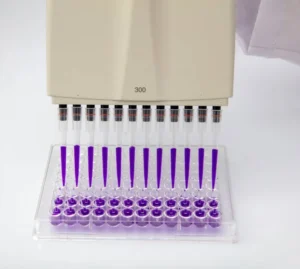
Using a micropipette, carefully add your samples or reagents to the wells. Here are a few tips for loading the plate:
- Pipetting technique: Hold the micropipette vertically and dispense the liquid slowly to avoid bubbles.
- Consistency: Ensure that each well receives the same volume of liquid for accurate results.
- Labeling: Keep track of your samples by recording which samples go into which wells. This is crucial for later analysis.

5. Incubation and Shaking
6. Reading the Results
- Using a Plate Reader: A plate reader is a machine that measures the response in each well of the plate. It can detect various types of signals, such as absorbance (color changes), fluorescence (light emission), or luminescence (glow).
- Setting Up: Place your microtiter plate into the plate reader and select the appropriate settings based on your experiment, such as the type of measurement (e.g., absorbance) and the wavelength of light if you’re measuring color changes.
- Taking Measurements: Activate the plate reader, and it will automatically scan each well and record the data. The machine will provide you with numbers representing the intensity of the signal in each well.
- Analyzing Data: The numbers obtained are typically analyzed using software. Compare these readings with your controls (wells with known results) to determine if your experiment was successful.
- Interpreting Results: Higher or lower numbers may indicate the presence or concentration of a substance you’re testing for. Review the data to draw conclusions from your experiment.
7. Cleaning and Reusing
Some microtiter plates are disposable, but others can be cleaned and reused. If you plan to reuse your plate, wash it thoroughly with the appropriate cleaning solution, rinse with distilled water, and allow it to dry completely. Make sure there is no residue left in the wells that could interfere with future experiments.
Tips for Using microtiter plate
- To avoid cross-contamination, always use clean pipette tips and refrain from touching the wells with the pipette to prevent contamination between wells.
- Work quickly but carefully, as many reactions depend on timing, so it’s essential to work efficiently while ensuring accuracy.
- Properly store your plate for later use by covering it with a lid or sealing film to prevent evaporation or contamination.
Common Applications of Microtiter Plates
- Researchers perform enzyme-linked immunosorbent assays (ELISA) to detect and measure proteins, antibodies, or hormones.
- Scientists culture cells in microtiter plates to observe cell growth, behavior, and response to treatments.
- Laboratories use microtiter plates for drug screening, testing multiple compounds to find potential new medications.
- Technicians conduct polymerase chain reactions (PCR) in microtiter plates to amplify DNA samples for genetic analysis.
- Researchers study enzyme activity by running enzyme assays in microtiter plates to understand biochemical reactions.
Conclusion
Microtiter plates are versatile tools that make it easier to perform experiments on a small scale with high precision. By understanding how to use them properly, you can ensure that your experiments are accurate, efficient, and reproducible. Whether you’re performing an ELISA, culturing cells, or screening drugs, following these steps will help you get the best results from your microtiter plate.

